How To Sand End Grain Cutting Board?
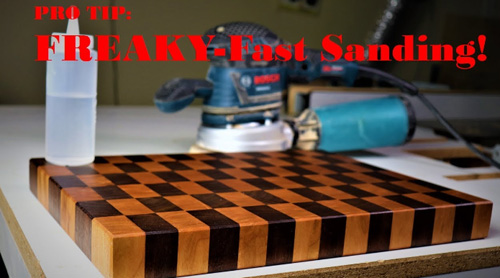
If you’re a woodworking enthusiast or just someone who loves cooking, you may be familiar with the beauty and functionality of an end grain cutting board. These types of cutting boards are known for their durability and ability to preserve the sharpness of your knives.
However, when it comes to finishing and maintaining an end grain cutting board, sanding can be a crucial step. In this blog post, we’ll guide you through the process of how to sand an end grain cutting board properly.
We’ll cover the tools and materials you’ll need, as well as provide step-by-step instructions to ensure a smooth and polished finish. So grab your sandpaper and let’s get started on transforming your cutting board into a true work of art!
How To Sand End Grain Cutting Board Step by Step Process
Sanding an end grain cutting board is an essential step in maintaining its smooth surface and prolonging its life. Here is a step-by-step process to sand an end grain cutting board effectively:
Materials and Tools You’ll Need:
- End grain cutting board
- Sandpaper of varying grits (e.g., 80, 120, 220, 320 grit)
- Sanding block or a flat surface (e.g., a piece of plywood)
- Safety goggles
- Dust mask or respirator
- Shop vacuum or a brush
- Mineral oil or food-safe cutting board oil (for finishing, optional)
Step-by-Step Process:
- Safety Precautions:
- Put on safety goggles to protect your eyes from dust and debris.
- Wear a dust mask or respirator to prevent inhalation of wood dust, which can be harmful.
- Prepare the Work Area:
- Set up your work area in a well-ventilated space or outdoors, if possible, to minimize dust buildup.
- Clean the Cutting Board:
- Ensure the cutting board is free of any food debris or residue. Clean it with warm, soapy water, rinse thoroughly, and allow it to dry completely before sanding.
- Select the Appropriate Grit:
- Start with coarse sandpaper, such as 80 or 120 grit, to remove any deep scratches, stains, or imperfections on the surface. You can gradually progress to finer grits for a smoother finish.
- Attach Sandpaper to a Sanding Block:
- Wrap the sandpaper around a sanding block or use a flat surface like a piece of plywood to maintain an even, flat sanding surface.
- Begin Sanding:
- Hold the sanding block at a slight angle to the cutting board and move it in a circular or back-and-forth motion, following the wood grain. Apply gentle, even pressure.
- Switch to Finer Grits:
- After sanding with the coarse grit, switch to a finer grit (e.g., 220, 320) to refine the surface further. This will remove any scratches left by the coarser grit and create a smoother finish.
- Check Progress:
- Periodically wipe away the dust with a clean, dry cloth to assess your progress. Continue sanding until you achieve the desired level of smoothness and remove all visible scratches.
- Edge Sanding:
- Pay special attention to the edges and corners of the cutting board, as they may require more sanding to achieve a uniform surface.
- Clean Thoroughly:
- Use a shop vacuum or a brush to remove all sanding dust from the cutting board and your work area.
- Finish (Optional):
- If desired, you can apply a food-safe mineral oil or cutting board oil to the sanded surface to nourish and protect the wood. Allow the oil to soak in and wipe away any excess after a few hours or overnight.
- Final Inspection:
- Examine the cutting board for any rough spots or imperfections. If necessary, perform additional sanding to achieve a smooth, even surface.
By following these steps, you can sand your end grain cutting board effectively, keeping it in good condition for extended use in your kitchen. Regular maintenance, including sanding and oiling, will help preserve the board’s beauty and functionality.
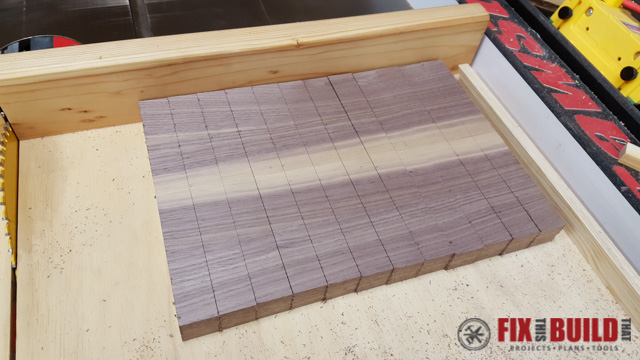
What is the best way to sand end grain?
If you’re looking for a beautiful and unique cutting board, an end grain cutting board is a great option. End grain boards are made by gluing together pieces of wood so that the end of each piece is facing up. This results in a cutting board that’s not only beautiful, but also extremely durable.
When it comes to sanding an end grain cutting board, there are a few things to keep in mind. First, you’ll want to use a coarse grit sandpaper to start. This will help to remove any major imperfections in the wood.
Once you’ve sanded with the coarse grit, you can move on to a finer grit to smooth out the surface. One of the most important things to remember when sanding an end grain cutting board is to sand in the direction of the grain. This will help to avoid any damage to the wood and will also result in a smoother finish.
What grit should I sand an end grain cutting board?
If you’re looking to refinish an end grain cutting board, or even make one from scratch, you’ll need to know how to sand end grain. While it may seem like a daunting task, sanding end grain is actually quite simple – as long as you have the right tools and techniques. The first step is to choose the right grit sandpaper.
For end grain, you’ll want to start with a coarse grit (60-80) to remove any major imperfections, then move to a finer grit (100-120) for a smooth finish. If you’re working with particularly hard or dense wood, you may even need to go up to a very fine grit (150-180). Once you’ve selected the right sandpaper, the next step is to attach it to your sander.
For end grain, you’ll want to use a palm sander or a random orbit sander.
How do you surface an end grain cutting board?
End grain cutting boards are one of the most popular types of cutting boards on the market. They are made from pieces of wood that have been cut so that the end of the grain is facing up. This type of cutting board is revered for its durability and beauty.
When it comes to sanding an end grain cutting board, there are a few things to keep in mind. First, you’ll want to use a sandpaper with a grit that is appropriate for the type of wood you are working with. Second, you’ll want to make sure that you sand in the direction of the grain.
And finally, you’ll want to take your time and be careful not to sand too deeply, as this could damage the cutting board.
With these tips in mind, sanding an end grain cutting board is a relatively easy process. Simply start with a coarse grit sandpaper and work your way up to a finer grit.
How do you smooth end grains on wood?
End grain cutting boards are made from pieces of wood that have been cut into thin strips and arranged so that the end of each strip is exposed. These boards are incredibly durable and can last for many years with proper care. End grain cutting boards can be a bit tricky to sand, but with a few tips and tricks, it’s not as difficult as it may seem.
The first thing to keep in mind when sanding end grain is to use a very fine grit sandpaper. Coarser grits will quickly damage the wood and leave behind unsightly scratches. A good rule of thumb is to start with a grit that is twice as fine as the grit you would use on regular lumber.
Another important tip is to sand in the direction of the grain, not against it. This will help to avoid tear out and will leave a smoother surface. Start with light pressure and increase as needed.
Finally, be sure to sand evenly across the entire surface.
How.to smooth end grain cutting board
If you’re looking for a durable cutting board that will last for years, an end grain cutting board is a great option. They’re made from pieces of wood that are glued together with the grain running in different directions, which makes them very strong and resistant to warping.
End grain cutting boards can be a bit more difficult to sand than other types of boards, but with a little patience and the right tools, it’s not too difficult.
Here’s what you’ll need:
– A belt sander or orbital sander
– 120 grit sandpaper
– 220 grit sandpaper
– A wood sealer (optional)
Start by sanding the board with the 120 grit sandpaper to remove any roughness.
Then switch to the 220 grit sandpaper and sand until the board is smooth. If you’re using a sealer, apply it now and let it dry according to the manufacturer’s instructions.
Sanding cutting board grit
End grain cutting boards are extremely popular among home cooks and professional chefs alike. They are prized for their durability and beauty, and can last a lifetime with proper care. While end grain cutting boards are relatively easy to care for, they do require a bit of special attention when it comes to sanding.
End grain cutting boards are made up of small pieces of wood glued together in a checkerboard pattern. The grain of the wood runs perpendicular to the surface of the cutting board, which makes it extremely durable. However, this also means that the grain can be difficult to sand.
The best way to sand an end grain cutting board is to use a palm sander with fine-grit sandpaper. Start with the sandpaper that has the highest grit number and work your way down to a lower grit. For example, start with 220-grit sandpaper and then move to 150-grit.
Sanding cutting board
When it comes to sanding end grain cutting boards, there are a few things to keep in mind. First, you’ll want to use a coarse grit sandpaper to remove any roughness or unevenness. Start with a 60-grit and work your way up to a 120-grit.
Next, use a fine grit sandpaper to smooth out the surface. Start with a 220-grit and work your way up to a 400-grit. Finally, finish with a very fine grit sandpaper to give the board a nice, smooth finish.
Start with a 600-grit and work your way up to an 800-grit.
Which direction to sand end grain
If you’re looking to sand your end grain cutting board, there are a few things you’ll need to keep in mind. First, you’ll need to sand with the grain to avoid damaging the board. Second, you’ll need to use a finer grit sandpaper to avoid leaving behind scratches.
And finally, you’ll need to be patient and take your time to avoid damaging the board.
With those things in mind, let’s get started. First, you’ll need to gather your supplies.
You’ll need a sanding block, sandpaper (we recommend starting with 120 grit), and a vacuum. Once you have your supplies, it’s time to start sanding.
Begin by sanding along the grain of the board.
You can use long, even strokes or circular motions. Just be sure to sand with the grain to avoid damaging the board. As you sand, you’ll likely see the wood start to change color.
This is normal!
Can you sand an oiled cutting board
If you’re looking for a durable cutting board that will last for years, then an end grain cutting board is the way to go. These cutting boards are made from pieces of wood that are glued together so that the grain of the wood runs perpendicular to the surface of the board. This creates a cutting surface that is much harder to damage than a traditional cutting board.
End grain cutting boards can be a bit tricky to sand, but with a little patience and the right tools, it’s not too difficult. Here’s what you’ll need: -A hand sander or power sander
-Fine grit sandpaper (120-220 grit) -Medium grit sandpaper (80-100 grit) -Coarse grit sandpaper (40-60 grit)
Start by sanding the surface of the board with the coarse grit sandpaper. This will remove any major imperfections in the wood.
Routing end grain cutting board
If you’re looking to sand your end grain cutting board, there are a few things you’ll need to keep in mind. First, you’ll need to use a sandpaper with a grit that’s appropriate for the type of board you have. For a softer board, you’ll want to use a lower grit sandpaper, while a harder board will require a higher grit.
Next, you’ll need to sand in the direction of the grain, not against it. And finally, be sure to sand evenly across the entire board to avoid creating any dips or divots.
With these tips in mind, sanding your end grain cutting board should be a breeze.
Just be sure to take your time and work slowly and carefully. And if you’re not sure what grit sandpaper to use, ask a professional at your local hardware store.
How to glue end grain cutting board
If you’re looking for a sturdy, reliable cutting board, you can’t go wrong with an end grain cutting board. End grain cutting boards are made by gluing together blocks of wood so that the end grain of the wood is exposed on the surface. This makes for a cutting board that is very strong and durable, and one that will last for years with proper care.
If you’re planning on making your own end grain cutting board, there are a few things you need to know. First, you’ll need to choose the right wood. Hardwoods like maple or walnut are ideal, as they’re both strong and durable.
You’ll also want to make sure that the boards you select are of a similar thickness, as this will make for a more even surface.
Once you have your wood, it’s time to get started. The first step is to sand the end grain of the boards.
Belt sander end grain cutting board
One of the most important steps in creating a beautiful and functional end grain cutting board is sanding the end grain. This can be a bit of a challenge, but with a little patience and the right tools, you can achieve a beautiful, smooth surface.
The first step is to select the right sandpaper.
You’ll want to use a very fine grit sandpaper, such as 2000 grit or higher. The reason for this is that the end grain is very porous and can easily become gouged if you use a coarser sandpaper.
Next, you’ll want to attach the sandpaper to a sanding block.
This will help to ensure that you sand evenly and avoid creating any dips or valleys in the surface of the board.
Once the sandpaper is attached, you can begin sanding the end grain. Start with long, even strokes, working your way back and forth across the grain.
Conclusion
End grain cutting boards are made from pieces of wood that are glued together so that the grain of the wood is running vertically. This type of cutting board is very durable and is less likely to show knife marks than other types of cutting boards. To sand an end grain cutting board, you will need to use a belt sander or a power sander.
Start with a coarse grit sandpaper and sand the board in the direction of the grain. Then, switch to a finer grit sandpaper and sand the board in the opposite direction of the grain. Finally, use a very fine grit sandpaper to sand the board in the direction of the grain.

