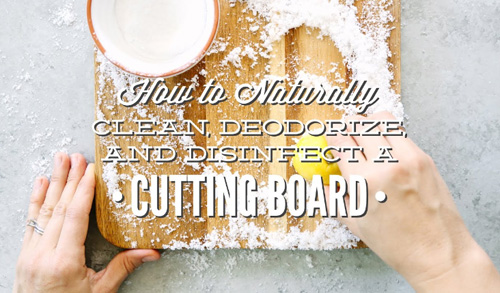
How To Make Resin Cutting Board? 8 Easy Step
If you’re looking for a unique and interesting cutting board, you can make your own resin cutting board. This DIY project is easy to make and you can customize it to your own taste. All you need is a cutting board, resin, and some colorants or decorations.
In this article, we will guide you through the step-by-step process of How To Make Resin Cutting Board. Resin cutting boards are not only functional but also visually appealing, making them an excellent addition to any kitchen. Whether you’re a DIY enthusiast or a seasoned crafter, this project offers a fantastic opportunity to unleash your creativity and create a one-of-a-kind piece that will impress your family and friends.
Materials You’ll Need
Before we dive into the exciting world of resin pouring, let’s gather all the necessary materials for this project:
- Wood board (oak, walnut, or maple are great options)
- Sandpaper (various grits)
- Resin (epoxy resin is recommended)
- Pigment dyes (for adding color to the resin)
- Mixing cups and stir sticks
- Painter’s tape
- Silicone mold (for shaping the board edges)
- Safety gear (gloves, safety goggles, and a respirator mask)
- Heat gun or a propane torch (for removing air bubbles)
How To Make Resin Cutting Board Step By Step Process?
Step 1: Preparing the Wood Board
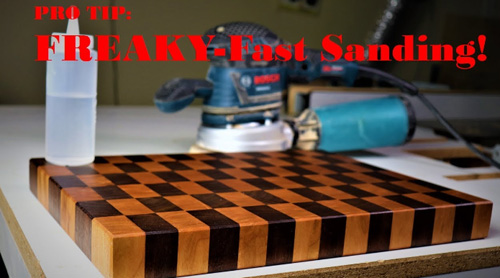
Begin by selecting a high-quality wood board. The size and shape are entirely up to you, but a standard rectangular board works well for most cutting tasks. Sand the board’s surface thoroughly, starting with coarse sandpaper and gradually progressing to finer grits. This process will ensure a smooth and even surface for the resin.
Step 2: Creating the Mold
To achieve a beautiful edge design, use painter’s tape to create a border around the wood board. Additionally, prepare the silicone mold following the manufacturer’s instructions. Place the wood board inside the mold, ensuring it fits snugly.
Step 3: Mixing the Resin
Carefully read the instructions on the resin packaging and measure the appropriate amount of resin and hardener into separate mixing cups. Once measured, combine the two components and stir thoroughly for the recommended time to avoid uncured spots.
Step 4: Adding Pigment Dyes
If you wish to add color to your resin cutting board, now is the time to do so. Choose your desired pigment dyes and mix them into the resin following the manufacturer’s guidelines. Stir until the color is evenly distributed throughout the mixture.
Step 5: Pouring the Resin
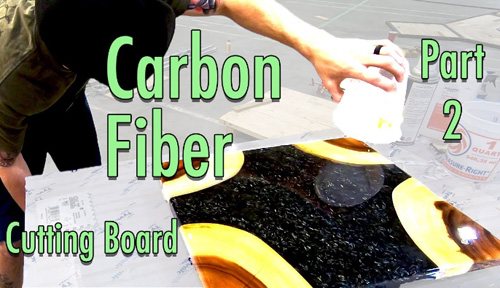
With your wood board securely in the mold, slowly pour the colored resin over the surface. Make sure to distribute the resin evenly, covering the entire area and filling any edges or corners. Use a heat gun or propane torch to remove any trapped air bubbles by gently passing the flame over the resin’s surface.
Step 6: Curing Process
After pouring the resin, allow the cutting board to cure according to the resin’s instructions. The curing time can vary depending on the type of resin used, so be patient and avoid touching or moving the board during this period.
Step 7: Demolding and Finishing
Once the resin has fully cured, carefully remove the painter’s tape and demold the cutting board from the silicone mold. Sand the edges lightly to smoothen any rough spots. Additionally, sand the board’s surface to achieve a polished and glossy finish.
Step 8: Final Touches
Inspect the cutting board for any imperfections or blemishes. If necessary, perform any touch-ups to ensure a flawless end product. You may also consider applying a food-safe finish to enhance the board’s durability and preserve its beauty for years to come.
FAQs:
Is resin cutting board safe for food preparation?
Yes, when properly cured and finished, resin cutting boards are safe for food preparation.
Can I use different types of wood for the cutting board?
Absolutely! Different types of wood can add unique patterns and textures to your resin cutting board.
How long does resin curing typically take?
Resin curing times can vary but usually range from 24 to 72 hours, depending on the resin type and environmental conditions.
Can I use the cutting board for hot items?
It’s best to avoid placing hot pots or pans directly on the resin surface, as extreme heat can damage the resin.
Can I create other resin items using the same technique?
Certainly! The resin pouring technique can be applied to create various artistic and functional pieces like coasters, trays, and more.
Does Epoxy Resin Make a Good Cutting Board?
Epoxy resin can make a good cutting board when used properly and with the right considerations. However, it’s essential to understand both the advantages and limitations of epoxy resin cutting boards before making a decision.
Advantages of Epoxy Resin Cutting Boards:
- Durability: Epoxy resin creates a strong and durable surface that can withstand the cutting and chopping actions in the kitchen. It is less prone to knife marks and scratches compared to some other materials.
- Customization: Epoxy resin can be tinted with various colors or combined with other materials like wood, creating unique and visually appealing designs for the cutting board.
- Water and Stain Resistance: Once properly cured and finished, epoxy resin is resistant to water, stains, and most chemicals, making it easy to clean and maintain.
- Artistic Possibilities: Epoxy resin allows for creative designs and patterns, making the cutting board both functional and a piece of art in the kitchen.
Limitations and Considerations:
- Cutting Surface Hardness: While epoxy resin is durable, it may not be as hard as materials like glass or some types of hardwood. Heavy and forceful cutting can lead to chipping or damage to the resin surface.
- Maintenance: Resin cutting boards require proper care and maintenance. It is essential to clean them with mild soap and water, avoiding abrasive cleaners or prolonged soaking.
- Heat Sensitivity: Epoxy resin can be sensitive to extreme heat. Placing hot pots or pans directly on the resin surface can cause damage or deformation.
- Knife-Friendly Surface: Depending on the resin type and finishing, some epoxy resin cutting boards may be gentler on knives compared to harder surfaces like glass or stone. This can be advantageous for maintaining knife sharpness but might result in slightly more wear on the cutting board.
What kind of Resin is Used for Cutting Boards?
The type of resin commonly used for making cutting boards is food-grade epoxy resin. Food-grade epoxy resins are specifically formulated to be safe for food contact and are considered non-toxic after they have fully cured. They are widely used for various food-related applications, including creating resin cutting boards.
Food-grade epoxy resins are chosen because they offer several beneficial properties, such as:
- Safety: Food-grade epoxy resins are formulated to meet strict safety standards, ensuring that no harmful chemicals leach into the food during use.
- Durability: Once fully cured, epoxy resin creates a durable and strong surface that can withstand the cutting and chopping actions in the kitchen.
- Resistance: Epoxy resin is resistant to stains, water, and most chemicals, making it suitable for use in food preparation areas.
- Aesthetics: Epoxy resin can be transparent or tinted with various colors, allowing for creative and visually appealing designs in the cutting board.
When using epoxy resin for making cutting boards, it is crucial to follow the manufacturer’s instructions for proper mixing, curing, and finishing. This ensures that the resin fully cures and reaches its maximum safety and durability levels, making the cutting board safe and functional for food preparation.
Can You Cut on a Resin Cutting Board?
Yes, you can cut on a resin cutting board. Resin cutting boards are generally designed to be used as regular cutting surfaces, similar to traditional wooden or plastic cutting boards. However, it’s essential to handle them with care to maintain their longevity and appearance.
Here are some tips for cutting on a resin cutting board:
- Use Sharp Knives: Using sharp knives will help prevent excessive pressure on the cutting board’s surface, reducing the chances of scratches or damage to the resin.
- Avoid Cutting with Excessive Force: While resin cutting boards are durable, they may not be as hard as some materials like glass or stone. Avoid using excessive force while cutting to prevent chipping or cracking.
- Rotate Cutting Areas: To ensure even wear, rotate the areas of the cutting board you use regularly. This helps distribute any minor wear more evenly across the surface.
- Clean and Dry After Use: After cutting, clean the board with mild soap and water, then dry it thoroughly. Avoid soaking the cutting board in water for an extended period, as this may affect the resin’s integrity.
- Avoid Cutting on Resin Art: If your resin cutting board has unique art or designs embedded within the resin, it’s a good idea to avoid cutting directly on these areas to preserve the artwork.
By following these guidelines, you can enjoy using your resin cutting board for food preparation while keeping it in good condition for an extended period.
Conclusion:
If you’re looking for a unique and interesting cutting board, you can make your own resin cutting board. Resin is a material that can be molded and shaped, and it’s also heat-resistant, making it ideal for a cutting board. You can find resin at your local hardware store, and it’s relatively easy to work with.
To make a resin cutting board, you’ll need a mold, resin, and hardener. You can use any mold you like, but it’s important to make sure that it’s heat-resistant. Once you have your mold, mix the resin and hardener together according to the instructions on the package.
Once the mixture is ready, pour it into the mold and let it set. Once the resin has hardened, you can remove the cutting board from the mold and start using it. Resin cutting boards are durable and easy to clean, and they make a great addition to any kitchen.