How To Make A Cutting Board Without A Planer?
If you’re looking for a quick and easy project that doesn’t require a lot of planning, a cutting board is the perfect option. With just a few supplies and a little bit of time, you can create a beautiful and functional cutting board that will last for years.
Here’s what you’ll need to get started:
– 1×6 boards (enough to create the size cutting board you want)
– Wood glue
– Clamps
– Sandpaper ( coarse and fine grit)
– Mineral oil
– Beeswax
To start, cut your boards to the desired size and then sand the edges to create a smooth surface. Next, apply a generous amount of wood glue to one edge of each board and then clamp them together. Let the glue dry for at least 24 hours before unclamping and sanding the boards again.
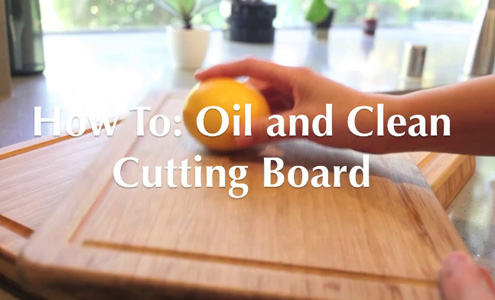
Now it’s time to apply the finish. First, soak a clean cloth in mineral oil and rub it into the surface of the cutting board. Allow the oil to soak in for at least 30 minutes, then wipe off any excess.
Next, melt some beeswax in a double boiler and brush it onto the surface of the board. Allow the wax to cool and harden before using your new cutting board!
- Find a piece of lumber that is the desired thickness for the cutting board
- Cut the lumber to the desired length and width
- Sand the edges of the lumber until they are smooth
- Apply a food-safe finish to the cutting board
DIY Cutting Board WITHOUT a Planer
How to make a cutting board with minimal tools
If you’re looking to add a cutting board to your kitchen but don’t have a lot of tools, don’t worry! It’s actually quite easy to make a cutting board with minimal tools. Here’s what you’ll need:
-A saw (hand saw or circular saw)
-A drill
-Sandpaper
-Wood glue
-Clamps
First, you’ll need to cut your boards to the desired size.
If you’re using a hand saw, it’s best to mark your cut line with a pencil first. Then, simply line up the blade with the line and start sawing. If you’re using a circular saw, you can just plunge the blade into the wood where you want to make your cut.
Once your boards are cut to size, it’s time to drill some holes. This is for the purpose of adding handles to your cutting board later on. Drill four holes, evenly spaced, into each end of your boards.
Now it’s time to start sanding. You’ll want to start with a coarse grit sandpaper and work your way up to a finer grit. This will ensure that your cutting board has a smooth surface.
Once your boards are sanded, it’s time to glue them together. Apply a generous amount of wood glue to the edges of one of your boards and then place the other board on top, aligning the edges. Then, clamp the boards together and let the glue dry.
Once the glue is dry, your cutting board is ready to use! If you want, you can add handles by screwing them into the holes you drilled earlier. Or, you can leave the handles off and use your cutting board as a trivet. Either way, you now have a functional and stylish cutting board that you made yourself!
How to make a cutting board from a log
If you’re looking for a fun and unique cutting board, why not try making one from a log? It’s a simple process that only requires a few supplies.
Here’s what you’ll need:
– A log, preferably 4-6 inches in diameter
– A saw
– A drill
– Sandpaper
– Mineral oil
– A cloth
First, saw your log into the desired length. Cut it into 1-2 inch thick slices, making sure that the slices are all of even thickness.
These holes will be used to string the slices together. Once the holes are drilled, sand each slice until it is smooth. Be sure to sand both the top and bottom, as well as the edges.
Now it’s time to string the slices together. Use a strong cord or twine to thread through the holes, tying a knot in between each slice. Once all the slices are strung together, it’s time to apply the mineral oil.
This will help protect the wood and keep it from drying out. Simply pour a generous amount of oil onto the cutting board and use a cloth to spread it evenly. Let the cutting board sit for a few hours to allow the oil to soak in, then it’s ready to use!
Making a cutting board without a jointer
If you don’t have a jointer, you can still make a cutting board! Here’s how:
1. Start with a piece of wood that is already flat.
If you have a piece of wood that is warped or cupped, you can try to flatten it out with a hand plane or a belt sander.
2. Cut the wood into strips that are about 1″ wide.
3. Glue the strips together, being sure to align the edges as best as you can.
4. Clamp the glued up board and let it dry overnight.
5. Once the glue is dry, you can sand the board smooth. Start with a coarse grit sandpaper and work your way up to a fine grit.
6. Finish the board with a food safe oil or beeswax. Apply the finish with a clean cloth and rub it in well. Let the board dry completely before using it.
How to make a cutting board without a table saw
If you’re looking to make a cutting board without a table saw, there are a few different ways you can go about it. One option is to use a hand saw. This will require more time and effort, but it’s definitely doable.
Another option is to use a jigsaw. This will be a bit easier than using a hand saw, but you’ll still need to take your time and be careful.
If you have access to a router, that’s definitely the best way to go.
With a router, you can make incredibly precise cuts and get a perfect finish. Of course, you’ll need to have a good understanding of how to use a router before attempting this method.
No matter which method you choose, the most important thing is to take your time and be careful.
Cutting boards can be tricky to make, but with a little patience and attention to detail, you can definitely do it!
Do i need a jointer to make cutting boards
As a general rule, you don’t need a jointer to make cutting boards. You can use a straight edge and a hand saw to get the job done. However, there are a few instances where a jointer would be helpful.
If your boards are warped or cupped, a jointer can help flatten them out. This is especially important if you’re cutting boards from hardwood, as warping can make them more difficult to work with.
A jointer can also be used to create a beveled edge on your boards.
This can be helpful if you’re looking to create a decorative edge.
Overall, a jointer isn’t necessary to make cutting boards. However, it can be helpful in some situations.
If you have the space and budget for a jointer, it’s worth considering. Otherwise, a straight edge and hand saw will do the trick.
Hand planer for cutting board
A hand planer is a great tool to have when cutting boards. It allows for a more precise and even cut, which is essential when working with wood. Here are some tips on how to use a hand planer to get the best results:
1. Always use a sharp blade. This will help to prevent your hand planer from becoming dull and will also make for a cleaner cut. 2. Make sure the board you are cutting is level.
This will help to ensure an even cut. 3. When cutting, start at one end of the board and work your way to the other. 4. Use light pressure when cutting.
This will help to prevent the board from splintering. 5. Use a guide when cutting. This will help to keep your hand planer level and will also help to prevent the board from moving.
6. Always sand your board after cutting. This will help to smooth out any rough edges and will also help to prevent splinters. 7. When finished, clean your hand planer with a damp cloth.
This will help to remove any wood chips or debris that may be on the tool.
End grain cutting board without planer
An end grain cutting board is a cutting board that is made with the grain of the wood running vertically. This type of cutting board is more durable and harder to damage than a traditional cutting board. In order to make an end grain cutting board, you will need to have a planer.
A planer is a tool that is used to remove the bark from the tree. Once the bark is removed, the tree can be cut into thin strips that are then glued together.
End grain cutting boards are ideal for cutting meats and vegetables.
They are also great for slicing bread. The end grain cutting board is a bit more expensive than a traditional cutting board, but it is worth the investment.
Planing a cutting board
When it comes to planing a cutting board there are a few key things you need to keep in mind. The first is the size of the board. You want to make sure the board is large enough to accommodate whatever you plan on cutting.
The second is the material. You want to make sure you choose a material that is durable and will not dull your knives. The third is the thickness.
You want to make sure the board is thick enough to absorb the impact of your knife without damaging the counter beneath it.
When it comes to choosing the right size cutting board, you want to make sure you have enough surface area to comfortably cut whatever you need to. If you are constantly having to stop and move things around, you are more likely to damage your knives or the board itself.
The material you choose for your board is also important. Some materials, like bamboo, are very durable and will not dull your knives. Others, like plastic, are less durable and more prone to damage.
You also want to make sure the board is thick enough to absorb the impact of your knife without damaging the counter beneath it.
When it comes to planing a cutting board, size, material, and thickness are all important factors to keep in mind. Choosing the right board for your needs will help you avoid damage to your knives and the counter beneath the board.

Credit: diyhuntress.com
What can I use if I don’t have a planer?
Assuming you don’t have access to a planer and need to flatten a board, there are a few different ways you can go about it.
The most common way is to use a jointer. A jointer will take one face of your board and make it flat, creating a 90 degree angle with the other face and edge.
You can then take this newly flat face and put it up against the jointer’s fence to flatten the other side of the board.
You’ll want to start with a relatively sharp plane and take light passes, gradually working your way across the board until it’s flat. If you have access to a router, you can also use a straight bit to flatten one side of the board. This is similar to using a hand plane, but will be a bit quicker.
Finally, if you have access to a belt sander, you can use that to flatten one side of the board. Again, you’ll want to take light passes and gradually move across the board until it’s flat. Whichever method you choose, it’s important to take your time and work slowly and carefully to avoid damaging the board.
How do you make a simple cutting board?
There are a few different ways that you can make a cutting board, but the most common and simplest method is to just use a piece of wood. You can either use a hardwood or a softwood, but hardwoods are generally preferred because they are more durable and less likely to dull your knives.
The first step is to find a piece of wood that is the right size and thickness for your needs.
It should be at least 1 inch thick and at least 18 inches wide. Once you have your piece of wood, you will need to sand it down to make sure that it is smooth. You can either use a hand sander or a power sander for this.
Once the wood is sanded, you will need to apply a food-safe finish to it. This can be done with a mineral oil, beeswax, or even just a regular coat of polyurethane. Once the finish is applied, you can then use your cutting board.
If you want to make a more elaborate cutting board, you can add features such as a juice groove or a handle. However, these are not necessary and will just add to the cost of your board.
What can I use to cut if I don’t have a cutting board?
If you don’t have a cutting board, there are a few things you can use as a substitute. A plate can work in a pinch, but be careful not to cut into the plate itself. A countertop or table is also an option, but make sure it’s clean before cutting anything on it.
You can also use a cutting board liner, which is a thin, flexible cutting board that can be placed on top of another surface.
How do you hand plane a cutting board?
When hand planing a cutting board, you will need to use a few different strokes to get a smooth surface. First, use a light back and forth motion across the grain to level the board. Next, use a circular motion to remove any remaining bumps.
Finally, use a light back and forth motion with the grain to create a smooth surface.
Conclusion
This blog post explains how to make a cutting board without a planer. The first step is to find a piece of wood that is the right size and thickness. The next step is to cut the wood into strips that are the same width.
The next step is to glue the strips together. The next step is to sand the cutting board. The last step is to oil the cutting board.
![Top 5 Best Bbq Cutting Board [2023]](https://kitchenapplince.com/wp-content/uploads/2022/03/Best-bbq-cutting-board.png)