How To Seal Wood Burned Cutting Board?
If you’ve recently created a beautiful wood burned cutting board, you may be wondering how to properly seal and protect your masterpiece. Wood burning is a popular technique for adding personalized designs to wooden surfaces, but it’s important to seal the wood to ensure its longevity and durability.
In this blog post, we’ll guide you through the steps of sealing a wood burned cutting board, including choosing the right sealant, preparing the surface, and applying the sealant for a professional finish. So grab your wood burning tools and let’s get started on preserving your work of art!
Here are the Top 3 best-selling cutting boards!


How To Seal Wood Burned Cutting Board?
Sealing a wood-burned cutting board helps protect it from moisture, stains, and bacterial growth. Here’s a step-by-step guide on how to seal a wood-burned cutting board:
Materials and Tools:
- Wood-burned cutting board: Ensure the wood burning is complete and smooth.
- Sandpaper: Fine-grit (e.g., 220) for smoothing the surface.
- Tack cloth or a damp cloth: To remove dust after sanding.
- Food-safe wood sealer or mineral oil: Look for products labeled safe for use on cutting boards or kitchen utensils.
- Clean cloth or brush: For applying the sealer.
- Plastic wrap or a plastic bag: To cover the cutting board during the drying process.
Steps:
- Sand the Surface:
- Use fine-grit sandpaper to smooth the surface of the wood-burned cutting board.
- Sand in the direction of the wood grain to avoid creating scratches.
- Clean the Board:
- Wipe away any dust created by sanding using a tack cloth or a damp cloth.
- Ensure the surface is clean and dry before applying the sealer.
- Choose a Sealer:
- Select a food-safe wood sealer or mineral oil. Mineral oil is a popular choice for cutting boards as it is safe for food contact.
- Apply the Sealer:
- Pour a small amount of sealer onto the board.
- Use a clean cloth or brush to spread the sealer evenly over the entire surface, including the sides.
- Pay special attention to any areas that may have intricate wood burning.
- Let it Absorb:
- Allow the sealer to be absorbed by the wood. The time required may vary depending on the type of sealer used.
- Follow the manufacturer’s instructions for drying times.
- Repeat if Necessary:
- Some sealers may require multiple coats. Follow the product instructions to determine if additional coats are necessary.
- Allow each coat to fully dry before applying the next.
- Wipe Excess:
- After the final coat, wipe away any excess sealer with a clean cloth.
- Allow Drying Time:
- Let the cutting board dry completely. This may take several hours or as directed by the sealer instructions.
- Cover and Cure:
- Cover the cutting board with plastic wrap or place it in a plastic bag to protect it while the sealer cures.
- Reapply as Needed:
- Depending on use, you may need to reapply the sealer periodically to maintain protection.
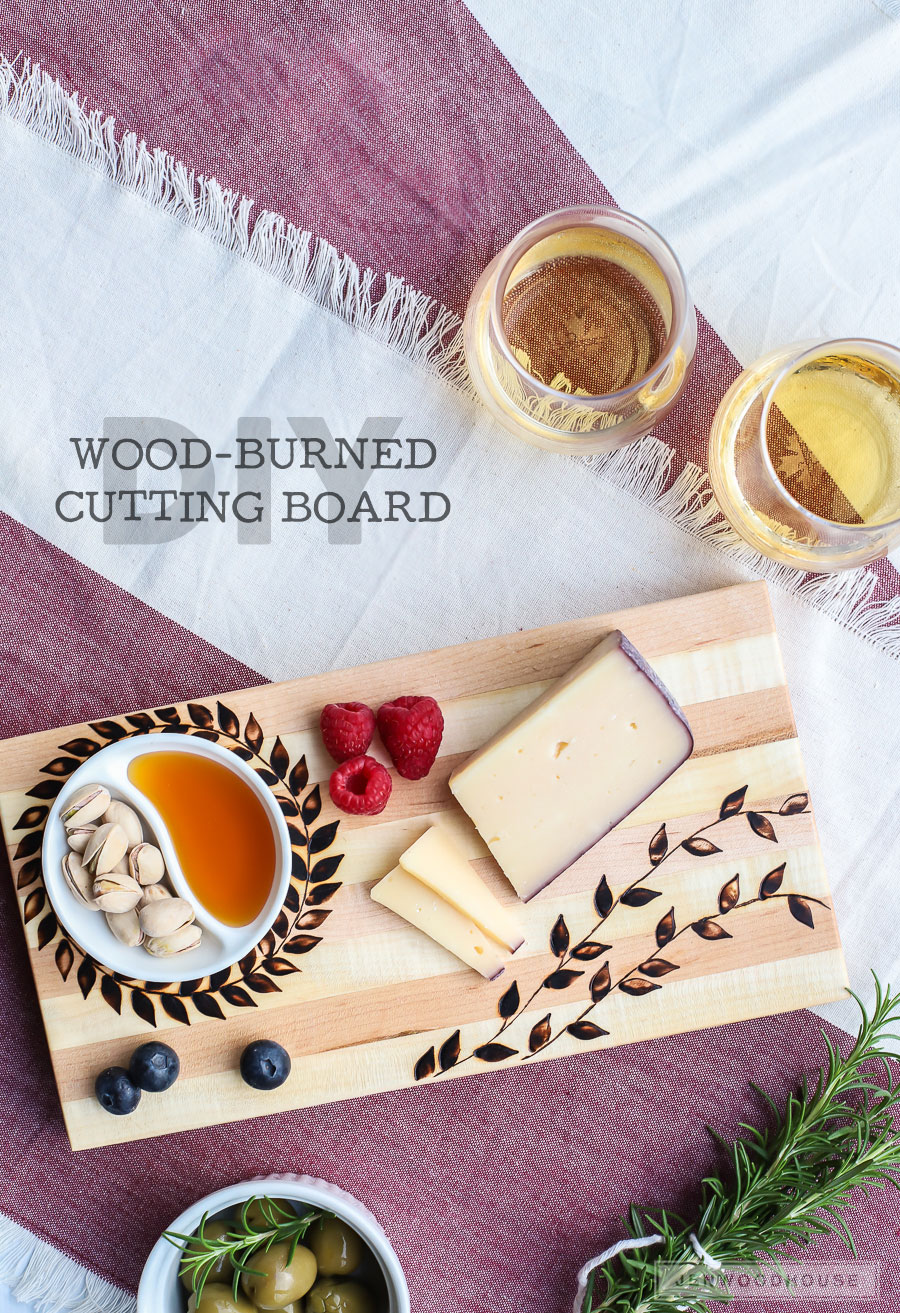
Credit: jenwoodhouse.com
What do you use to seal burnt wood?
If you’re looking to seal your wood burned cutting board, there are a few things you’ll need to do. First, you’ll need to sand the board down with fine grit sandpaper. This will help to smooth out any rough edges and ensure that the sealant will adhere properly.
Next, you’ll need to clean the board with a damp cloth to remove any dust or debris. Once the board is clean, you can then apply a food-safe sealant. We recommend using a beeswax-based sealant, as it’s easy to apply and provides a natural barrier against moisture and bacteria.
Simply apply the sealant to the board with a clean cloth, then buff it dry. You’ll need to reapply the sealant every few months to keep your board looking and working like new.
Do you have to seal wood after burning it?
When it comes to sealing wood burned cutting boards, there are a few things you need to keep in mind. First, you need to make sure that the board is completely clean and free of any debris. If there is any food or grease on the board, it will not seal properly.
Once the board is clean, you can either use a brush or a sponge to apply the sealer. Be sure to evenly coat the entire board, including the sides and the back. Allow the sealer to dry for at least 24 hours before using the board.
How do you fix a burnt wooden cutting board?
When it comes to sealing wood burned cutting boards, there are a few different methods that you can use. The most common method is to use a clear sealer, like a polyurethane or varnish. You can also use an oil-based sealer, like mineral oil.
Whichever method you choose, make sure to apply several thin coats, allowing each one to dry completely before applying the next.
If you’re using a clear sealer, start by sanding your cutting board with fine-grit sandpaper. This will help create a smooth surface for the sealer to adhere to.
Next, wipe the board down with a clean, dry cloth to remove any dust. Then, using a brush or a rag, apply the sealer evenly across the surface of the board. Again, make sure to apply several thin coats, waiting for each one to dry completely before moving on to the next.
What do you put on wood after wood burning?
If you’re looking for a unique and beautiful cutting board, look no further than a wood burned cutting board. Wood burning is a great way to add a personal touch to any project, and a cutting board is no exception. Plus, with a little bit of care, a wood burned cutting board can last for years.
Here’s how to seal your wood burned cutting board so it will be both beautiful and durable. Before you begin, it’s important to choose the right wood for your project. Hardwoods like maple, cherry, and oak are ideal for cutting boards because they’re durable and won’t dull your knives.
If you’re looking for a more unique look, try using a softer wood like pine or poplar. Just keep in mind that softer woods are more likely to show wear and tear over time. Once you’ve selected your wood, it’s time to get started on the burning.
How to seal wood burned spoons
If you’re like me, you love the look of a wood burned cutting board. They add a beautiful, rustic touch to your kitchen and they’re so easy to make! But there’s one downside to wood burned cutting boards: they’re not very durable.
That’s why it’s important to seal your wood burned cutting board with a food-safe sealant. This will protect the wood from moisture and bacteria, and it will also make the board easier to clean. Here’s how to seal your wood burned cutting board:
1. First, make sure the board is clean and dry.
2. Then, apply a thin layer of sealant to the entire surface of the board.
3. Let the sealant dry for 24 hours.
4. Once the sealant is dry, your board is ready to use!
5. To clean your board, simply wipe it down with a damp cloth.
Sealing burnt wood
Assuming you want a tutorial on how to make a wood burned cutting board: You will need:
- a cutting board (wooden is best)
- a wood-burning tool
- carbon paper
- a pencil
A design of your choice
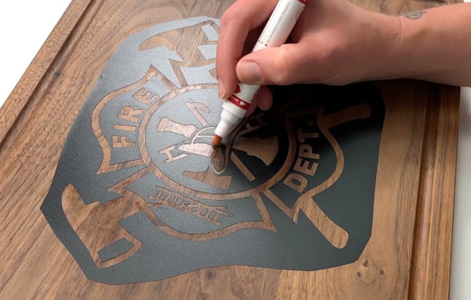
1. First, you will need to find or create a design that you want to use for your cutting board. Once you have your design, trace it onto carbon paper.
2. Place the carbon paper on your cutting board, and then trace over the design with a pencil. This will transfer the design onto your cutting board.
3. Now you are ready to start wood burning! Slowly trace over your design with the wood-burning tool. Be careful not to go too fast, or else you might burn through the wood.
4. Once you are finished wood burning, your cutting board is ready to use!
Ammonium chloride wood burning food safe
If you’re looking for a way to add a personal touch to your kitchen, consider sealing a wood burned cutting board. This project is relatively easy and only requires a few supplies.
To get started, you’ll need a cutting board (preferably one made of hardwood), a sealer, and a burner.
If you don’t have a burner, you can use a wood burning kit or a soldering iron.
Once you have your supplies, start by burning your design into the cutting board. If you’re using a wood burning kit, follow the manufacturer’s instructions.
If you’re using a soldering iron, heat it up to a high temperature and then carefully burn your design into the wood.
Once you’re happy with your design, it’s time to seal the board. This will protect the wood and help the design last longer.
Apply a thin layer of sealer to the entire board, making sure to cover the design completely.
Shou sugi ban cutting board
If you’re looking for a way to protect your wood cutting board and make it last longer, then sealing it with a food-safe sealant is a great option. Here’s a step-by-step guide on how to do it:
1. Begin by sanding down the cutting board with medium-grit sandpaper.
This will help to create a smooth surface for the sealant to adhere to.
2. Next, clean the board with a damp cloth to remove any dust or debris.
3. Once the board is clean, apply a thin layer of sealant to the surface using a paintbrush or roller.
Be sure to evenly cover the entire surface.
4. Allow the sealant to dry for 24 hours before using the cutting board. 5. Repeat this process every few months to keep the cutting board protected and looking like new.
Can you wood burn bamboo cutting board
Assuming you would like a blog post discussing how to properly seal a wood burning cutting board: When it comes to wood burning, sealing is key to protecting your design and keeping your cutting board looking great for years to come. Here are the basic steps for sealing your wood burning cutting board:
1. First, sand your cutting board down with a fine-grit sandpaper. This will help to smooth out the surface of the wood and prepare it for sealing.
2. Next, clean your cutting board with a damp cloth to remove any dust or debris.
3. Once your cutting board is clean and dry, it’s time to apply the sealer. You can use a brush, sponge, or even a spray bottle to apply the sealer evenly over the surface of the wood.
4. Allow the sealer to dry completely before using your wood burning cutting board.
And that’s it!
Wood burning cutting board designs
If you’re like me, you love the look of a wood burned cutting board. They add a rustic charm to any kitchen and can really make a statement. But if you’re not careful, they can also be a real pain to keep clean.
Here’s how to seal a wood burned cutting board so that it will be easier to maintain and will last for years to come.
First, you’ll need to sand the cutting board down. I like to use a fine grit sandpaper so that the wood is smooth but not too smooth.
Once you’ve sanded the board, you’ll want to wipe it down with a damp cloth to remove any debris.
Next, you’ll need to apply a food-safe sealant. I like to use beeswax, but you can also use mineral oil or another food-safe option.
Mineral oil for cutting board
If you’re looking for a unique and personalized cutting board, wood burning is a great option! Not only does it add a beautiful and rustic touch to your kitchen, but it’s also a practical way to protect your cutting board from bacteria and water damage. Here’s a step-by-step guide on how to seal your wood burned cutting board:
1. Start by sanding your cutting board with medium-grit sandpaper. This will help to smooth out any rough edges and prepare the surface for sealing.
2. Next, clean the board with a damp cloth to remove any dust or debris.
3. Once the board is clean, apply a generous amount of food-safe mineral oil to the surface. Use a clean cloth to spread the oil evenly.
4. Allow the oil to soak in for at least 24 hours before using the cutting board.
Custom wood burned cutting board
If you’re looking for a unique and beautiful cutting board, look no further than a wood burned cutting board! Burning a design onto a cutting board is a simple process that anyone can do with a few supplies. Here’s what you’ll need to get started:
-A cutting board (I prefer something made of hardwood like maple or walnut)
-A wood burning tool
-A design template
-A pencil
-A paintbrush
-A clear sealant
First, start by sanding your cutting board down with medium grit sandpaper. This will create a smooth surface for your design. Next, trace your design onto the cutting board with a pencil.
If you’re not confident in your freehand abilities, you can print out a design template and use it as a guide.
Once your design is penciled in, it’s time to start burning! Hold your wood burning tool like a pencil and start tracing over your lines.
Conclusion
Sealing a wood burned cutting board is a simple process that will help protect your board from water damage. First, clean the board with a mild soap and water. Next, sand the board with a fine-grit sandpaper.
Once the board is sanded, apply a thin layer of food-grade mineral oil to the board. Finally, buff the board with a clean cloth.