Guide:How To Seal A Wooden Cutting Board
Do you have a wooden cutting board that you hate because it always seems to get ruined? If so, this article is for you! In just a few simple steps, you’ll be able to seal the wooden board so that it doesn’t get ruined by bacteria and food.
Not only will this prevent your board from becoming a source of contamination, but it will also make it easier to clean. So don’t wait – get started sealing your wooden chopping board today.
So, you’re wondering how to seal a wooden cutting board? Don’t worry, I’ll explain the process step by step. Let’s dive in!
Related: Best Wooden Cutting Board [ Click Here ]
How To Seal A Wooden Cutting Board
In the processing of sealing wooden cutting boards, there are some steps you need to follow. First, you need to know about the sealers. Then comes the process of applying. Let’s talk about all of that.
Need Materials to Seal a Wooden Cutting Board:
To seal your wooden chopping board, first, you need to know about the safe and suitable sealers for your cutting board because your cutting board is something that contacts with your food directly.
So what are the products that can be used as a sealer? Well, a few things are used for sealing wooden cutting boards. They are:
- 1. Mineral oil.
- 2. Beeswax.
- 3. Coconut Oil.
- 4. Carnauba.
- 5. Tung Oil or Pure tung oil.
- 6. Linseed Oil.
Process of Sealing Your Wooden Cutting Board:
To protect your cutting board, you have to apply oil to seal the hardwood surface. You can use mineral oil to be in the safe zone. Mineral oils, sometimes called liquid paraffin, are a non-toxic, non-drying product derived from petroleum that is colorless, odorless, and flavorless. It is a very good sealer for wood products.
Step 1:
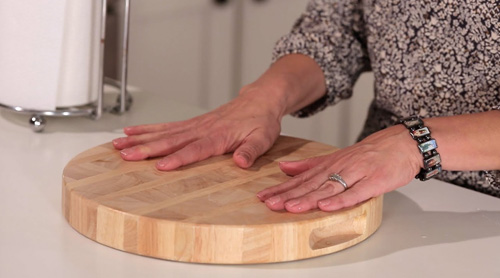
Squeeze a liberal butcher block wood oil or food-grade mineral oil onto a cloth rag. At first, apply the oil to all sides of the wood by rubbing thoroughly. Gently rub the cloth rag in a circular motion and let the board soak the oil to it. Then wipe off any excess oil with a paper towel. Repeat the process on the other side of the board.
Step 2:
We want to penetrate the pores of the wood. So let the board soak or absorb the oil in it. After soaking the oil, wipe off the excess with the cloth.
Step 3:
Let the oil dry. You can lean it up in a corner so that it does not leave marks from any areas making contact with the surface.
Step 4:
Once it is dry, reapply the process until the wood stops absorbing the oil. We need to coat at least three times.
Step 5:
Finally, for the third coat, you can treat your cutting board with mineral oil and wax. And what’s great about that combination is that it lets your final coat revive a used cutting board every time you use it. So you don’t have to worry about ruining your chopping board. You’ll always have a nice shine.
How to Make The Combination of Mineral Oil and Wax:
For this step, I will tell you about my favorite wax mixture. I apply it to coating my chopping board. I usually start with mineral oil, and I need a double boiler. If we just put the oil in a pot and put it on the stove to melt the wax into the oil, the oil could burn, and we can also have some safety issues.
So to keep that from happening, I take one pot and put some water in it. Bring that water to a slightly rolling boil and then I take another pot and have a float in there. The oil never gets hotter than 212 degrees because, at that point, the water turns to steam and never burns the oil.
So first, measure out 6 ounces of mineral oil and pour that into the pot. Now take the beeswax, measure 10 rounded teaspoons of wax, and pour it into the oil that is heating up already.
Now you can stir it up, but make sure it is still in hot water. You will know that you’re done when the whole mixture turns clear. The wax melts evenly into the mineral oil, making an emulsion.
Put the mixture in a jar so that you can use that easily. You have to keep it for a while to cool it down. Once it is cool, they’ll give you a nice paste-style wax. So that when we rub it in, it fills in all the marks from your knives.
Take some of the mixtures and rub them with the cloth on the board’s surface in a circular motion. This will give your cutting board an extra layer of sealing. Once you have, it pushed in a nice transfer and went with the grain. Then find a clean spot on the cloth and wipe off the excess. Repeat the process to all sides of the board.
Importance to Seal Wooden Cutting Board:
Wooden cutting boards can last for years. So, sealing should be done regularly (every few months), depending on the frequency of use of your wood chopping board. You can seal your board once a month or twice if you use your board frequently.
Regular sealing helps prevent the board from drying out and, as a result, cracking. You will know when to re-seal your board as the board will lighten as the sealant wears off. Sealing your board regularly gives shine and keeps it in good condition.
FAQ:
What is the best way to seal a wooden cutting board?
There are a few different ways to seal a wooden chopping board, but the best method depends on the type of wood and the surface treatment. If the wood is untreated or has a low level of protection, a coat of oil or sealant can be applied. If the wood is treated with a finish, such as a lacquer or a varnish, the finish should be applied first, and the board should then be sealed.
Some other factors to consider when sealing a cutting board include the size of the board, the shape, and the surface treatment. If the board is too large or too small for the task at hand, it may not be able to withstand the moisture and abrasive elements that can be present in a kitchen. The shape of the board can also affect how it is used. For example, a circular cutting board is more versatile than a rectangular one, but a rectangular one is more useful for slicing bread.
How do you clean a sealed wooden cutting board after use?
If you’re like many people, you probably don’t want to deal with cleaning a dirty cutting board after every use. Fortunately, there are a few easy steps you can take to clean a sealed wooden chopping board without dealing with the extra work.
To clean a sealed wooden cutting board:
- Cover it with plastic wrap and place it in the freezer for at least two hours. This will help to harden the surface and make it easier to clean.
- Use weak dish soap and warm water solution to clean the board.
- Rinse off the soap and water after each use.
- Dry the board off with a cloth and store it in a clean location.
What are some of the benefits of using a sealed wooden cutting board for food preparation?
Sealing your wooden cutting board can reduce the risk of food-borne illness by up to 98%. It can also prolong the life of your chopping board, preventing it from warping, cracking, or splintering. Using a sealed cutting board will also avoid the risk of cross-contamination.
Sealing your cutting board also protects your knives from dirt and bacteria also keeps your food safe. Doing this will reduce the risk of food-borne illness and make sure your knives are sharper for a cleaner and safer cutting experience.
Another benefit of using a sealed wooden cutting board is that it can help you reduce the amount of time you spend in the kitchen. Using a sealed chopping board will avoid the need to wash and sanitize your cutting board multiple times throughout the day. This will save you time and energy, and you will be able to use those resources for other tasks more efficiently.
What is the best way to seal a wooden cutting board?
There are a few ways to seal a wooden cutting board, but the most common is to use a food-grade sealant. This type of sealant is designed to protect the board’s surface from food contamination and odors. It can also be used to protect the board from moisture and bacteria.
Another popular way to seal a chopping board is with a hot glue gun. This method is quick and easy, and it can be used to seal just about any board. Just make sure that the glue does not seep into the wood, or it will cause damage. Lastly, you can use a wood finish to seal the cutting board. This type of sealant is applied using a brush, and it can be used to cover just about any wood. Again, make sure to use a sealant specifically designed for wood surfaces, as this type of finish can be difficult to remove.
Do wood cutting boards need to be sealed?
Yes, wood cutting boards need to be sealed to prevent bacteria and fungus growth. This can be done by applying a food-grade sealant to the board’s surface. Some popular sealants include Silicone and Acrylic.
What do you use to coat a wooden cutting board?
To keep your wooden cutting boards and utensils in good condition, use a food-grade mineral oil that is not prone to rancidity. You can find inexpensive bottles of mineral oil in most kitchen supply stores.
Conclusion:
For the safety of your wooden chopping board or walnut board, it is important to seal it. This article tried to explain the process of How To Seal A Wooden Cutting Board and the benefits of sealing. So that’s the last thing to know about the sealing of a wooden chopping board. A good food-safe finish that can revive every time you use it. I hope this article will help you. Let us know if there is any suggestion or experience about sealing your board.