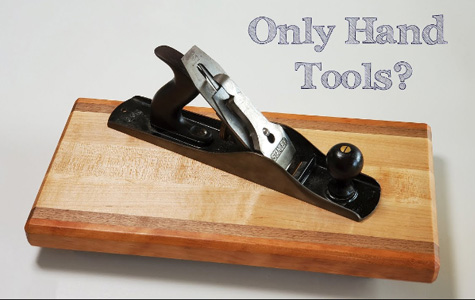
How to Make a Cutting Board With Hand Tools
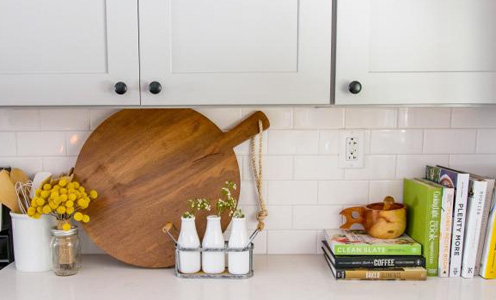
Cutting boards are mostly common kitchen utensils that we all use every day. You can have them in different stores in the market, and also you can make them on your own. For this, you need to follow some easy methods. You can use some hand tools for making your own cutting board. I have experimented by doing so, and the result is great. So I am sharing it with you so that it may help you.
Check out our blog on how to make a cutting board with hand tools. This cutting board is durable and can be used in any kitchen, dining room, or bar. Plus, it’s easy to make and can be finished in just a few minutes. So why wait? Get started today!
Required Materials of Making a Cutting Board With Hand Tools:
For making your own Cutting Board, you will need some equipment. Let’s check out the list below:
- A wood board.
- A sharp blade.
- A chisel or hand saw.
- Jigsaw.
- Table Saw.
- Hammer.
- Sandpaper.
- Clamps.
- Planer.
- Router with Chamfer.
- Wood Glue.
- A sheet of glass.
Process of How To Make A Cutting Board With Hand Tools
I assume you have all the correct personal protective equipment—safety glasses, dust mask, etc. I also assume that you have some basic experience or training with woodworking and the associated tools. Make sure you read the operating instructions of the tools you use to understand how to operate them safely and effectively.
There are many resources available to you on how to choose maple wood but the most important consideration when making maple cutting boards is that maple should be pressure treated. While other woods such as cherry, hickory, and walnut can withstand high temperatures with little damage like firewood, some will chip or break if in contact with hot surfaces for very long periods.
Step 1: Gather Materials and Tools
I went to a lumber store to purchase my hardwood. I selected and bought boards that were the same thickness dimensionally. Also, you will need to have a square, some titebond III glue, a band saw or jigsaw, parallel bar clamps, an orbital sander, and a belt sander. Finally, you will need food-grade mineral oil for treating the cutting board.
Step 2: Decide Your Dimensions
Pick a size that works for you. Think about where you will store it and adjust the dimensions accordingly. I decided to make my cutting board 2 inches thick, which might be thicker than the average-sized cutting board. Take a look at the cutting boards you buy in the store to get some ideas. Overall dimensions are 1.5 inches thick by 14 inches long by 12 inches wide.
Step 3: Cut the Boards
Using a table saw, I cut my boards to the same dimension—2 inches. Don’t worry about the length of the boards at this point. In this step, we’re just concerned about the 2-inch dimension. This will be the overall thickness of the cutting board after the boards are glued together. You could easily reduce this to 1.5 inches if you like. Read the operating instructions of your table saw. Be constantly aware of where you place your fingers.
Step 4: Glue Boards Together
Use Titebond III glue because it is waterproof. Lay some newspapers down under the clamps. Apply the glue liberally to the face of each board and then clamp them together. Excess glue will get squeezed out and go everywhere. I recommend taking a damp rag and wiping the excess glue off the boards.
This will make the clean-up and sanding step a lot easier later. Hopefully, the newspaper will catch a lot of the glue and keep it from getting on your work surface. Ensure the boards are all resting as level as possible on the clamp rails. They won’t be perfectly even across the bottom or top surface. This problem will be solved when we get to the sanding step.
Step 5: Square Up the Cutting Board
I ran the glued-up cutting board through my table saw and squared up the board. You can use a square to check your cuts. I allowed the Titebond III glue to set up overnight.
Step 6: Cut Off the Corners
Making the corners curved would give the cutting board an added touch. I used a cup and a pencil to make some marks for my cuts. You can use any round object to make these curved marks. I used a bandsaw to make my cuts. You could also use a jigsaw. Read the operating instructions for your cutting tools and make sure the blades are sharp and everything is in good working order.
Also, you can use a router with a chamfer to round the edge a bit. This will make your cutting board look so classy.
Step 7: Sand the Cutting Board
I have a portable Black & Decker belt sander and a Ryobi belt/disc sander that rests on my bench. Both are inexpensive. In this instruction, I used the Ryobi belt/disc sander for the cutting board.
I prefer to do this sanding step outside. So, I pulled out my portable Workmate workbench and rested the belt/disc sander on it. It also helps if you have a fan that you can run to blow the dust away from you or use a dust collector if you have one.
Put on your safety glasses and dust mask and sand away.
Initially, you want to get rid of cut marks and make everything smooth and level. After you accomplish the rough sanding, go back over it with an orbital sander. Use 120 grit, 220 grit, and 320 grit sandpaper. I like to take a paper towel and denatured alcohol and rub that on the wood between sanding. It helps to clean away excess dust and raise the grain for subsequent sanding.
Step 8: Finish Sanding
You have to go back over the board with your orbital sander and eliminate any cut marks left from the router bit. Get the board as smooth as you possibly can.
Step 9: Apply Mineral Oil
Wipe the board clean with either a damp rag or denatured alcohol. Allow the board to completely dry. Once it’s dry, take another rag and apply some food-safe mineral oil. You can purchase this from Home Depot or Bed, Bath, and beyond. Apply a liberal amount and allow 30-40 minutes for it to absorb into the wood.
Perform this step 2 or 3 more times or until the wood will not soak up any more oil. Go ahead and wipe away the excess oil, and your board is finished. I would recommend letting the board set overnight before the first use. The mineral oil will help protect the board over time.
Step 10: Caring for Your Cutting Board
You can do a few things to keep your board in tip-top shape. For cleaning, you can run the board through soapy water. Just don’t allow it to soak in soapy water. After a few uses, you can apply more mineral oil.
As the board gets cut up with longer use, you may elect to take it out to the sander and repeat the sanding steps from this tutorial. That will eliminate the cut marks and make your board like new. Another option is to leave one surface alone. That way you always have an unmarred surface that you can display in your kitchen.
Hopefully, this tutorial has given you the tools to create your own cutting board. I would love to hear from those of you that have done so! Leave me a comment below and tell me about your project.
FAQ
What Is a Good Method For Making a Cutting Board With Hand Tools?
There are many ways to make a cutting board with hand tools, but one of the easiest and most efficient is to use a jigsaw. This is because a jigsaw has a wide blade that can easily cut through even the thinnest boards. To make the most of your jigsaw, be sure to use a cutting guide, which will help you align the blade exactly where you want it. Additionally, be sure to use a wood protector on the board to prevent any damage.
If you don’t have a jigsaw, you can also use a saw or a handsaw. Both of these tools have smaller blades that are less efficient when it comes to cutting through thicker boards. In order to make the most of these tools, you will need to use a wood guide and a wood protector. Sawing can also be dangerous if you don’t use proper safety precautions, so be sure to wear gloves, eye protection, and a face shield when sawing.
How Can I Improve My Technique When Making a Cutting Board With Hand Tools?
Making a cutting board with hand tools can be a daunting task, but with a bit of practice and some instruction, you can improve your technique and produce a quality cutting board that you will be proud to display. The first step is to determine the size and shape of your cutting board. Next, use a wood jointing jig to create the desired shape. Make sure the cutting board is stable before you start cutting by clamping it to a workbench or table.
Once your cutting board is shaped, it is time to start making the cuts. Use a sharp knife, and be sure to hold the blade perpendicular to the board. Make even, clean cuts that are perpendicular to the grain of the wood. You can also use a chisel or plane to smooth out the cuts. Finally, apply a coat of wood finish to protect your board and make it look beautiful.
What Are The Benefits of Using a Hand Tool to Make a Cutting Board?
Using a hand tool to make a cutting board can be a great way to save time and money. Also, it increases your diy skill. It eliminates the need for purchasing a separate cutting board, but it also allows you to customize your cutting board to fit your needs.
By using a hand tool, you can make a cutting board that is the perfect size for your needs, and that is also durable and easy to clean. Additionally, using a hand tool can be a great way to improve your carving skills. By hand-carving your cutting board, you can ensure that the shape and design are exactly what you want.
Additionally, using a hand tool can be a great way to show your personality and style. By creating a cutting board that is unique and personal, you can showcase your craftsmanship and personality. Plus, it can be a fun and interactive project shared with friends and family.
How long Does It Take to Make a Cutting Board With Hand Tools?
This answer could vary depending on the specific tools and techniques used and the quality of your wood, but in general, it should take approximately a few hours to a few days. The key is to use a good quality wood that is easy to work with.
The most important part of the project is to make sure the cutting board is properly sized – this will ensure that it is both functional and attractive. First, remove the wood’s natural moisture with a dry cloth or a desiccant. Then, use a joint saw or hand saw to make the desired cuts. After the cuts are made, use a miter saw or a table saw to make the final cuts. Use protective gear, such as safety glasses, a face shield, and gloves.
Other important steps include ensuring that the wood is properly dried and treated and then using a wood saw to create the desired finished product. If a perfect finish is not desired, then a finishing option such as sealant or a wood varnish can be used.
Conclusion
Making a cutting board with hand tools can be a challenging process, but it can be a breeze with the right tools and some know-how! In this blog post, you can walk through the steps of making a cutting board with simple hand tools like an axe, saw, and hammer.
By following the tutorial step-by-step, you’ll be able to create a cutting board that is both functional and beautiful! So what are you waiting for? Start making your own cutting board today! Use the tips and tricks we provide to make your cutting board project a success.