Guide: How To Make An End Grain Cutting Board
Do you want to add a stylish and durable cutting board to your kitchen supplies? End grain cutting boards are a great option because they are made from solid wood, which makes them strong and durable. They also look great and are perfect for creating sophisticated kitchen decor. In this article, we will show you how to make an end grain cutting board using basic woodworking skills.
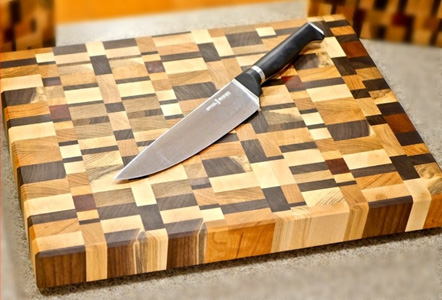
So, how do you make an end grain cutting board, and what makes this particular board so unique? Well, the end grain pattern make this board unique! And for the making process, each of these boards begins its life as a piece of cherry wood. Then, after the maple is cut out and placed on top in such a way that it starts creating distinctive natural stripes.
Now, we will talk about the making process and taking care of an end grain cutting board. So, without any ado, let’s jump on the tutorial.
What is an End Grain Cutting Board?
End grain cutting boards are made from a harder wood that has been cut perpendicular to the grain. This makes the board tougher, and more durable than boards cut perpendicular to the grain but with a more delicate feel. End grain boards are perfect for cutting fruits and vegetables, as they are less likely to tear or scratch the food than boards that are cut with the grain.
Additionally, end grain boards have a natural look and feel reminiscent of fresh wood. They are also easier to keep clean, as dirt and food can be easily wiped away. The end of the woods is used to make this special board, not the face grain or edge grain strips of wood.
Types Of End Grain Cutting Board
There are a few different types of end grain cutting boards. The most common type is the edge grain cutting board. These are made by cutting the boards at an angle so that the grain is perpendicular to the surface of the board. This makes for a very strong and durable cutting board.
Another type of end grain cutting board is the face grain cutting board. These are made by cutting the boards so that the grain is parallel to the surface of the board. This makes for a cutting board that is not as strong as the edge grain cutting board, but it is still durable.
The last type of end grain cutting board is the end grain butcher block. These are made by cutting the boards so that the grain is perpendicular to the surface of the board. This makes for a cutting board that is very strong and durable.
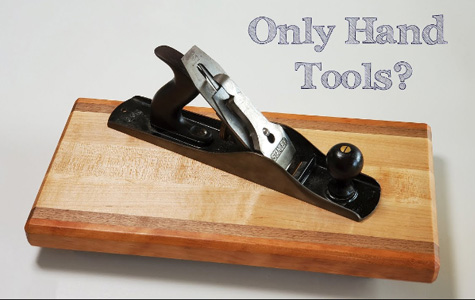
How To Make An End Grain Cutting Board
End grain cutting boards are a great way to add a touch of rustic charm to any kitchen. They are also a great way to prevent food from sticking to the board and making it difficult to clean. Making your own end grain cutting board is simple and can be done in just a few hours.
Required materials:
- 1-inch thick piece of hardwood (6-8 inches wide)
- Ruler or a straight edge
- Saw (Jigsaw, Circular saw, Table Saw, or Miter Saw)
- Jointer
- Router
- Sander (Drum sander, Orbital Sander, Belt Sander )
- Stiles (if desired)
- Wood glue and wood screws
- Sandpaper (optional)
Process of How To Make An End Grain Cutting Board
Look no further than end grain boards if you’re looking for a cutting board that will last for years. They’re made with a different type of wood, making them more durable and easier to care for. This article will show you how to make an end grain cutting board step-by-step, so you can start enjoying its benefits today!
Step 1: Choosing the Wood
The first step is to start by cutting the plank of wood to the desired size. If you’re using hardwood, such as oak or maple, it’s recommended to have the wood pre-sawn. In some areas of North America, this is done on purpose, and in other parts of the world, they only sell one-inch-thick logs. Pinewood are mostly used in making of an end grain cutting board.
You can take 2-inch thick plank with the height of 3feet and 1 feet in width. This thick plank of salvaged longleaf pine is the perfect size for this project. Run it through a planer to flatten both faces, then use a miter saw to crosscut it into two equal pieces and to square up the ends.
The thickness of the wood is not a problem for cutting boards as it doesn’t change once it has been cut. The thickness of your board depends upon how much glue and sandpaper you use to build up its thickness during construction on using a thickness planer metal check.
Step 2: Cut the Wood into Strips
Now it’s time to cut your board in half. For this purpose, you will need the following tools: Jigsaw-multi tool with a cutting blade is my personal favorite because I can hold onto the board at both ends as I make the cuts.
You can use a table saw to cut the wood into half first and then cut them into other half or as you are comfortable with. Make sure the strips of wood at the same thickness on all four sides. A push stick helps your finger keeping safe to cut strips.
If you want to make a puzzled board, you can use walnut and mahogany board or by your choice that are visible in color. That looks so good.
Step 3: Assemble the Strips
Once your strips are ready, you can assemble them for creating a pattern. If you are using two different types of wood, you can put one next to another.
To avoid your finished block cupping or splitting when the wood gets wet and dries out, be sure to turn each strip so that the direction of the end grain varies from one strip to the next.
Step 4: Glue Them Up
Now you have to glue the boards together. Glue can be applied to each board, but it is not quite as strong or precise when you use glues like cyanoacrylate. Make sure there are no gaps so the logs will rest firmly together later on.
In each group, set one strip aside and turn the others a quarter turn counterclockwise. Apply and spread the glue on the turned strips, first with an acid brush, then with a stick. Rotate each strip back a quarter turn, then place each set-aside strip against the exposed glue on one side of each assembly.
Wipe off or remove the excess glue from your board before it dries. The best way to facilitate this is probably by knowing where they each should sit and how long till you can assemble the walls somewhere else that is not up against a floor or wall.
Step 5: Clamp And Cut
I suggest clamping the log sections in clamps first on a flat surface, and then adding titebond glue according to how much space they need between them while allowing enough thickness that it’s easy pressing as they go into place.
Use clamps to secure the strips together in two panels. Wipe up any glue that squeezes out with a damp rag. Keep clamps in place while waiting few hours for the glue to dry before removing them and moving forward with other aspects of the project. When the glue is dry, clamp a stop to the miter-saw table 2 inches from the blade. Trim the panel ends. You have to cut each panel into identically sized strips.
Step 6: Place The Strips Accordingly
Place all the strips together and assemble them, so the end grains faces up. Shift each one sideways so that the glue joints in each strip are offset from the ones in the neighboring strips. Glue them up using the same technique as step 4.
And as step 5, clamp them after gluing and wipe off the excess. Wait for the glue to dry. Then we will be ready for the next step. Double up the glue and clamps this time. this will help the board to fix in its way and give a nice cut.
Step 7: Final Cut
Now cut the edges with a table saw or using a circular saw. For the surface, you can pass it through the planer and it will be smooth. The double method of the previous step helps this time. It prevents the ends from chipping. After planning, slice them off with a miter saw.
Step 8: Sand Your Board
From here, it’s just a matter of cleaning up edges, sanding & staining, and that’s what I present to you above in this finished version and mention grit and chamfer edges. This is a great way to make an end grain cutting board that won’t be rough after the first wash! You can use a router to round over each vertical corner, then at top and bottom edge.
Smooth all sides with a random orbit sander, starting with 100-grit sandpaper and finishing with 320 grit. The grit process will help any residue leftover from your removing tool marks on the board’s surface.
Step 9: Coat With Oil and Care
You can use either mineral oil or beeswax for this final waxing step to prevent water absorption if someone spills something on it while cleaning up. Still, I prefer mineral oil. Since there’s nothing added to it that might alter the taste or make it harmful to your food. Have some extra oil that’s easily re-usable like this on hand if they’re not too hard to come by, and you want a nice residual scent in the kitchen when cooking! Voila, instant comfort for everything you prepare (but don’t cook with oils alone.)
A good quality router is essential for any woodworker, so my router works so well given its age. You can rout the edge by hand or even get a router for the job, which make cutting and routing very easy. The router helps finish it in no time, giving it that perfect look for your next project without spending much on tools.
It really doesn’t take much skill once you get used to it, just keep an eye on how well everything fits together and try not to use too much glue or fixative at first!
How to Care for Your End Grain Cutting Board
End grain cutting boards are popular for chefs and home cooks because of their unique texture and appearance. However, like any piece of wood furniture, they must be taken care of in order to maintain their condition and appearance. Here are a few tips to help you take care of your end grain cutting board:
1. Protect it from moisture:
The first step is to protect your cutting board from moisture. This can be done by storing it in a dry location or by using a cutting board cover.
2. Avoid contact with sharp objects:
When working with sharp objects, avoid contact with the cutting board. You can place your work surface on the cutting board or using a work mat.
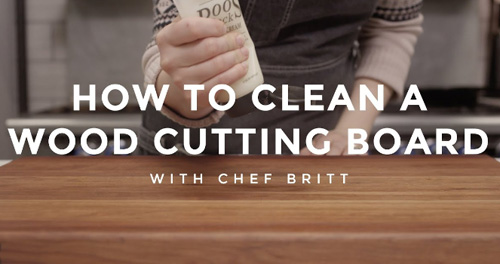
3. Clean it regularly:
It is important to wash your cutting board after use. That is because of the oils and liquids on your cutting board after its use. These can make their way into food, making you sick if not washed properly. So to prevent this, take a washcloth or sponge and wash it gently.
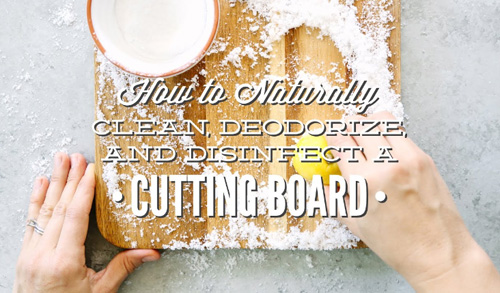
There are some things that you need to care about too. Whenever a board is sanded down, dull, or used to cut things (even if we intend it NOT to be), the final step in any seasoning process should always involve some solvent-based waxing. This will seal your raw wood and allow you to use your cutting board at its fullest potential without scratches being left behind as that damage-causing outer layer builds up.
I like using an all-natural Beeswax that I buy in bulk (found here ) because of its sap-based viscosity and ability to cover everything I need. We’ll be applying the wax with a soft cloth no matter what. But basic household cleaning items can also be used. The easiest is rubbing alcohol. Which will work great if you soak the board first (1 part rubbing alcohol to 2 parts warm water). Then soaking rag makes this process easy both for a cleanup and getting a nice clean cloth for application.
This allows the entire board to fully absorb into the wood before you coat another area at once, guaranteeing full saturation and a stronger bond (not to mention giving oil circulation over every inch). Additionally, later drips and such can also promote easier cleanup as you dampen and wipe off the board. So, always apply at least one layer of mineral oil/drying agent before the main portion.
FAQ:
How much wood do I need for an end grain cutting board?
There is no one answer to this question, as the amount of wood needed will vary depending on the cutting board’s size, shape, and construction. However, a typical cutting board will require between 2 and 4 cubic feet of wood. It is important to note that the amount of wood needed will also depend on the type of board. End grain boards will typically require more wood than standard boards because the grains are closer together.
If you are not sure how much wood you will need, it is best to contact a professional woodworker who can help you determine the correct amount. In addition, make sure to store the wood properly to not dry out or become infested with insects. If you follow these simple guidelines, you will be sure to have a cutting board that is both beautiful and functional!
What type of wood is used for end grain cutting boards?
A few different types of wood are used for end grain cutting boards, but the most popular and well-known is cherry. Cherry is a strong and durable wood resistant to warping and splitting. It also has a natural cherry color perfect for cutting boards. Additionally, the cherry is a sustainable resource, so you are helping to preserve the environment while using this type of wood.
Another popular wood used for end grain cutting boards is walnut. Walnut is a hardwood that is resistant to staining and fading. It has a beautiful walnut color that is perfect for cutting boards. Additionally, walnut is a sustainable resource, so you are helping to preserve the environment while using this type of wood. Another wood used for end grain cutting boards is mahogany. Mahogany is a softwood that is resistant to warping and splitting. It has a natural mahogany color that makes it perfect for cutting boards.
How do you make an end grain butcher block cutting board?
Making an end grain butcher block cutting board is a relatively easy process that can be completed in just a few hours:
- You will need to purchase a quality end grain butcher block from a reputable retailer.
- Then, You need to measure and cut the butcher block to the desired size.
- Also, You have to sand the surface of the butcher block to perfection.
Once the surface is sanded, you will need to apply a finish. Some popular finishes include polyurethane, linseed oil, or tung oil. Once the finish is applied, you will need to allow it to dry completely before using your new cutting board!
How much does it cost to make a cutting board like this?
Making an end grain cutting board can be a rewarding project, but it does require some time and effort to get it just right. The cost of a cutting board will largely depend on the type of wood used and the amount of customization required. However, a basic wooden cutting board will cost around $60-$100, with more elaborate and personalized boards costing upwards of $200.
When choosing the wood, it is important to select a hardwood resistant to moisture and insects. End grain boards are often made out of maple, birch, oak, or mahogany. Each has its unique characteristics and properties that must be taken into account. For example, mahogany is the most expensive wood option and is ideal for high-end cutting boards because of its deep color, high density, and long-lasting finish.
Can I use maple or walnut instead of oak, cherry, or mahogany for my project?
Yes, you can use maple or walnut for your project of making an end grain cutting board instead of oak, cherry, or mahogany. Maple and walnut are two common planks of wood used for cutting boards, and they both have some great benefits that make them a good choice for your project.
First of all, maple is a hardwood that is relatively resistant to moisture, which means that it will not rot and will last longer than other woods. Additionally, maple has a beautiful grain that is perfect for creating an end grain cutting board. Walnut is also a hardwood resistant to moisture and has a beautiful grain, but it is also a bit more expensive than maple. However, maple and walnut’s benefits over other woods make them a good choice for your project.
How thick should an end grain cutting board be?
This can be difficult to answer as it depends on various factors, including the type of wood being used, the shape of the board, and the intended use. Generally speaking, an end grain cutting board should be at least 1-inch thick. This will ensure that the board can support a heavy knife and prevents it from warping or bending. If you are not sure if your board is thick enough, you can test it by inserting a heavy knife into the board and see if it begins to flex. If it does, it is probably not thick enough, and you will need to purchase a thicker cutting board.
How much wood do I need for an end grain cutting board?
As wood requirements will vary depending on the type of wood, it is difficult to answer. The size of the board, and how often it will be used, is also mattered. However, a general rule of thumb is that you will need around 2-3 pounds of wood for every square foot of the board. So, if your cutting board is 24 square feet, you will need 48-72 pounds of wood. If used less often, you can go with a smaller amount of wood. Just be sure to store it properly not to dry out or become infested with pests.
How to Make an XL Butcher Block End Grain Cutting Board
Making an XL Butcher Block End Grain Cutting Board is a relatively easy project that can be completed in just a few hours. All you need is a standard butcher block and an extra-large piece of wood. The first step is to cut your extra-large piece of wood to the correct size. Then you can sand the surface down until it is smooth. Next, mark the corners of your butcher block with a pencil to know where to drill holes for the screws.
Next, drill holes in the corners of your butcher block, and then screw it in place using the screws that you marked earlier. Finally, paint the butcher block with a high-quality wood sealer to protect it from moisture and scratches. You’re done!
Is there any difference between the two types of wood used for making a cutting board: hardwood and softwood?
There is a small but noticeable difference between the two types of wood used for making an end grain cutting board: hardwood and softwood. Hardwood is denser and has a higher grain content. It makes a better choice for cutting boards that will be used for a long time. While softwood is also dense, its grain is more evenly distributed. It makes it a better choice for cutting boards that will be used frequently.
The main difference between the two types of wood is how they handle moisture. Hardwood holds on to water better, which results in a more durable cutting board. Additionally, hardwood is also less likely to stain or warp. On the other hand, softwood is more flexible and can pack more of a punch when it comes to stains and warp.
Conclusion:
If you’re like most cooks, you probably don’t have a lot of extra space in your kitchen to store cutting boards. That’s where a cutting board made from end grain wood comes in handy. End grain boards are the perfect size for smaller kitchens, and they’re also great for environmentally conscious people. This blog post will show you how to make an end grain cutting board using simple tools and materials.
Making a cutting board out of end grain wood can be a rewarding woodworking project if you go about it the right way. By following these simple steps, you’ll have a cutting board that is durable, beautiful, and perfect for your needs. Thanks for reading! Let us know how it goes!