How To Level End Grain Cutting Board? 10 Easy Step

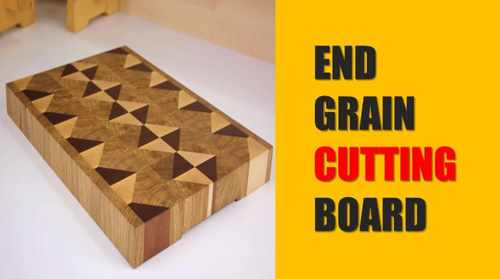
This end-grain cutting board is the perfect addition to your kitchen. It is durable and level, making it ideal for prepping your favorite meals. The cutting board is also easy to clean, so you can keep your kitchen looking its best.
How To Level End Grain Cutting Board
Leveling an end grain cutting board requires some basic tools and careful attention to detail. Here’s a step-by-step guide to help you through the process:
Materials and Tools Needed:
- End grain cutting board
- Sandpaper (various grits: coarse to fine, e.g., 80, 120, 220, 400, 600)
- Sanding block or sanding pad
- Flat surface (e.g., a workbench)
- Optional: Plane or belt sander (for larger cutting boards)
- Mineral oil or food-safe cutting board oil
Step-by-Step Guide:
- Clean the Cutting Board: Make sure the cutting board is clean and free from any food residues or debris. It’s essential to start with a clean surface.
- Assess the Surface: Examine the end grain cutting board for any uneven areas or high spots. You may notice certain parts of the board are higher than others, which is natural due to the varying wood grain.
- Use Coarse Sandpaper: Start with the coarsest sandpaper (e.g., 80 grit) and place it on a flat surface, such as a workbench. Lay the cutting board on top of the sandpaper, ensuring that the side you want to level faces down.
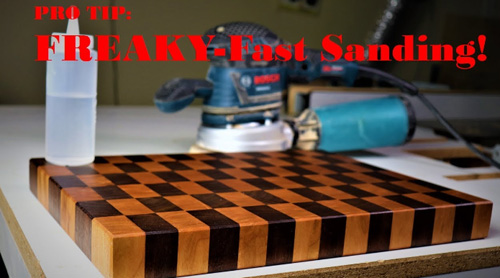
- Sand the High Spots: Using a sanding block or pad, sand the high spots gently. Move the sandpaper in a circular motion or back and forth to remove the excess wood gradually. Be patient and take your time to ensure even sanding.
- Check for Levelness: Periodically lift the cutting board and check the surface for levelness. You can do this by holding it up to eye level or using a straight edge to see if it sits flat. Continue sanding until the board’s surface is level.
- Progress to Finer Grits: Once the board is relatively level, switch to finer grit sandpaper (e.g., 120 or 220). Repeat the sanding process with this finer grit to smooth out the surface further.
- Optional: Use a Plane or Belt Sander: If you have a larger end grain cutting board, you may find it more efficient to use a hand plane or a belt sander to remove material quickly. Be cautious not to remove too much material at once; otherwise, it can lead to unevenness.
- Finish with Fine Sandpaper: Continue progressing through finer grits of sandpaper (e.g., 400, 600) until the cutting board’s surface is smooth and free from any rough spots or scratches.
- Apply Cutting Board Oil: After leveling and sanding, clean off any dust from the cutting board. Then, apply mineral oil or food-safe cutting board oil to nourish and protect the wood. Follow the manufacturer’s instructions for oiling.
- Reapply Oil as Needed: Over time, the cutting board may lose its luster. Apply more cutting board oil periodically to keep the wood well-conditioned and protected.
Remember, patience and attention to detail are crucial when leveling an end grain cutting board. Taking your time to sand and smooth the surface properly will result in a beautiful and functional cutting board that will serve you well for years to come.
How Do You Smooth Out An End Grain Cutting Board?
To smooth out an end grain cutting board, follow these steps:
- Prepare the cutting board: Ensure that your cutting board is clean and free of any debris or food particles. If it has been used extensively, clean it thoroughly with mild soap and water, and let it dry completely before proceeding.
- Select sandpaper grits: You’ll need different grits of sandpaper to gradually smoothen the surface. Start with a coarser grit like 80 or 120 to remove any rough patches or imperfections, and then move to finer grits like 220, 320, and finally 400 or 600 for a smoother finish.
- Sand the surface: Begin by sanding the cutting board with the coarsest grit sandpaper. Sand along the grain of the wood to avoid creating scratches. Apply even pressure and make sure to sand all areas of the board. Repeat this process with each progressively finer grit until you achieve the desired smoothness.
- Remove sanding dust: After each sanding step, clean the board to remove the sanding dust. You can wipe it with a damp cloth and let it dry completely before moving on to the next grit.
- Round the edges: To prevent sharp edges on the cutting board, you can use a router or sandpaper to slightly round the corners and edges. This step is optional, but it adds a nice finishing touch.
- Apply mineral oil or cutting board conditioner: Once you have achieved the desired smoothness, apply mineral oil or a food-safe cutting board conditioner to protect and enhance the wood. Follow the product instructions for application and drying times.
- Reapply oil as needed: End grain cutting boards tend to absorb more oil initially, so you might need to apply a few coats to ensure the wood is well-nourished and protected.
- Allow the cutting board to cure: Let the cutting board sit for a day or two after oiling to allow the oil to soak in and the board to cure properly.
How Do You Level an Uneven End Grain Cutting Board?
If you’ve ever wondered how to level an end grain cutting board, the process is actually quite simple. All you need is a straight edge, a level, and a few shims. First, place the cutting board on a flat surface.
Then, using the straight edge, find the high spot on the board. Once you’ve found the high spot, use the level to mark a line across the board at that spot. Next, take the shims and place them under the low spots on the board, until the board is level.
Once the board is level, use the straight edge to mark another line across the board. Finally, use a saw to cut along the lines you’ve marked. This will give you a perfectly level end-grain cutting board!
How Do You Flatten An End Grain Board?
Flattening an end grain cutting board requires a process called “leveling” or “planing” the board. This process involves removing high spots and uneven areas to create a flat and even surface. Here’s a step-by-step guide on how to flatten an end grain board:
- Safety first: Ensure you have the appropriate safety gear, such as safety glasses and a dust mask, to protect yourself during the process.
- Choose the right tools: To flatten an end grain board, you’ll need a hand plane or an electric hand planer. If you’re using a hand plane, a jack plane or a low-angle plane is recommended for end grain work. The blade of the plane should be sharp for effective cutting.
- Secure the board: Place the end grain board on a stable work surface, such as a workbench or sawhorse, ensuring it won’t move while you work on it.
- Identify high spots: Inspect the board’s surface to identify high spots and uneven areas. These spots will need to be planned down to achieve a flat surface.
- Adjust the plane: If you’re using a hand plane, adjust the depth of the blade so that it takes a shallow cut. You can make adjustments by turning the adjustment knob or lever on the plane.
- Start planning: Hold the plane with both hands and start planning across the grain on the high spots. Move the plane in smooth, even strokes, applying pressure on the forward stroke. Lift the plane at the end of each stroke to avoid creating dips in the wood.
- Check your progress: Periodically check the surface with a straight edge or a level to see how flat it is becoming. Continue planning until the entire surface is even and flat.
- Flip and repeat: Once you’ve planned one side of the cutting board, flip it over and repeat the planning process on the other side. This will help to ensure both sides are flattened evenly.
- Remove any tear-out: If you encounter tear-out (chipping or splintering of the wood) during the planning process, you can use a sharp chisel or sandpaper to remove the rough spots and create a smooth surface.
- Final sanding: After planning, you can finish the board by sanding it with progressively finer grit sandpaper to achieve a smooth surface. Sand along the grain to avoid scratches.
- Apply a finish: Finally, apply a food-safe finish, such as mineral oil or cutting board conditioner, to protect the wood and bring out its natural beauty.
Flattening an end grain board can be a labor-intensive process, but with the right tools and patience, you can achieve a flat and beautiful cutting surface.
Why Did My End Grain Cutting Board Warp?
End grain cutting boards can warp due to various factors, and understanding these reasons can help you prevent it from happening in the future. Here are some common reasons why end-grain cutting boards may warp:
- Moisture Imbalance: Wood is sensitive to changes in moisture levels. If the cutting board is exposed to excessive moisture or uneven moisture distribution, it can lead to warping. For example, if one side of the board gets wet while the other side remains dry, the moisture imbalance can cause the board to warp.
- Drying Too Quickly: If the cutting board dries too quickly, especially in dry or warm conditions, it can cause uneven shrinkage and lead to warping. Rapid drying can be a result of placing the board near a heat source or in direct sunlight.
- Insufficient Drying or Curing: When the cutting board is not adequately dried or cured before use, residual moisture can cause the wood to warp over time.
- Excessive Heat Exposure: Placing a hot pan or pot directly on the cutting board can cause localized heating, leading to uneven expansion and warping of the wood.
- Uneven Surface Planing: If the cutting board was not initially flattened properly or if it was not maintained with regular re-flattening, uneven surfaces can create stress points that eventually cause warping.
- Low-Quality or Improperly Selected Wood: Some types of wood are more prone to warping than others due to their inherent characteristics. Additionally, using wood with internal defects or improper grain orientation can increase the likelihood of warping.
- Improper Storage: Storing the cutting board in an area with fluctuating humidity levels or exposing it to moisture during storage can contribute to warping.
To prevent warping, consider the following tips:
- Use high-quality wood: Choose hardwoods known for their stability, such as maple, cherry, or walnut, for your cutting board.
- Season the wood properly: Allow the wood to acclimate to your workshop’s humidity before starting the cutting board project.
- Seal all sides: Apply a food-safe finish to all sides of the cutting board, including the bottom, to minimize moisture absorption and loss.
- Avoid excessive moisture exposure: Keep the cutting board dry and avoid submerging it in water. Clean it with a damp cloth and dry it thoroughly after each use.
- Store it properly: Store the cutting board in a dry and stable environment, away from direct sunlight and extreme temperature changes.
- Regular maintenance: Periodically reapply a food-safe finish, such as mineral oil, to keep the board nourished and protected.
By taking care of your end grain cutting board and minimizing moisture-related issues, you can significantly reduce the chances of it warping.
How to Plane End Grain Without Splitting?
Planing end grain without splitting can be a delicate process since the end grain is more prone to splintering than the long grain. To achieve the best results and avoid splitting, follow these steps:
- Choose the right plane: When planning end grain, it’s crucial to use a low-angle plane or a specially designed end grain plane. These planes have a lower blade angle, which reduces the chances of splintering.
- Sharpen the blade: Ensure the plane’s blade is sharp. A dull blade can tear the wood fibers, leading to splintering. Use a honing guide and sharpening stones to achieve a keen edge.
- Set the blade depth: Adjust the plane’s blade depth to take a shallow cut. This means only a small portion of the blade should protrude from the plane’s sole. A shallow cut reduces the force on the fibers and minimizes the risk of splitting.
- Grain direction matters: Always plane with the grain, following the direction of the wood fibers. This means moving the plane in a diagonal or perpendicular motion along the end grain, rather than against it.
- Support the wood: When planning the end grain, support the wood to prevent it from splintering or breaking. Use a sturdy workbench or a vise to hold the cutting board securely in place.
- Lighten the pressure: Apply gentle, even pressure when planning the end grain. Avoid using excessive force, as it can cause the wood fibers to tear.
- Make multiple passes: Instead of trying to remove a large amount of material in one pass, make multiple light passes. This allows the blade to cut cleanly through the wood fibers without causing splintering.
- Check for tear-out: Periodically inspect the surface for any signs of tear-out or splintering. If you notice any areas with tear-out, adjust your planning technique or blade depth accordingly.
- Support the exit side: Pay attention to the wood grain at the exit side of the planing stroke. This is where splintering is most likely to occur. To minimize splintering, you can place a sacrificial piece of wood or a backer board behind the end grain to provide support.
- Final sanding: After planning, you can use fine-grit sandpaper to further smoothen the end grain surface. Sand lightly in the direction of the wood fibers to avoid creating scratches.
By using the right tools, maintaining a sharp blade, planning with the grain, and supporting the wood properly, you can successfully plane the end grain without splitting. Patience and a careful approach will yield the best results when dealing with end-grain surfaces.
Conclusion
This blog post demonstrates how to level an end grain cutting board. The author begins by sanding the board with 120-grit sandpaper until the surface is smooth. Next, the author uses a router to level the board.
Finally, the author uses a hand plane to remove any remaining unevenness.


![How To Unwarp A Plastic Cutting Board [Ultimate Guide]](https://kitchenapplince.com/wp-content/uploads/2022/08/How-to-Unwarp-Plastic-Cutting-Board.jpg)
![How to Clean Wooden Cutting Board Mold [Expert Tips]](https://kitchenapplince.com/wp-content/uploads/2022/08/How-to-Clean-Wooden-Cutting-Board-Mold.jpg)